Are you trying to add HTTP security headers on the WordPress website?
WordPress website security is the most important thing to consider for the website owner. If your website is not secure then hackers can get access to your website very easily. That’s why it is very important to secure your website.
HTTP security header will enable a second layer of security to secure your WordPress website. If you add an HTTP security header then it will be able to block security issues and make your website safe and fast.
What is an HTTP security header?
It is a security factor to make sure that your server can prevent security issues so that they can’t affect your website. For example, when visitors come to your website you’re server will send an HTTP header to the visitor’s browsers. The HTTP header response will check the user’s browsers for any error code and other security issues.
HTTP security header protects your website from malware attacks, brute force attacks,s, and other security errors.
How to Add HTTP Security Headers in WordPress using a free plugin
There are a lot of ways you can add an HTTP security header to your WordPress website. You can add this using a CDN service or you can add a security header from your server. There are also some paid services available that offer many security features including an HTTP security header. But here in this article, we will show you the way to add an HTTP security header using a free WordPress plugin.
So here you are using the Redirection free WordPress plugin to add the security header. This is one of the easiest ways to add the HTTP security header to your WordPress website.
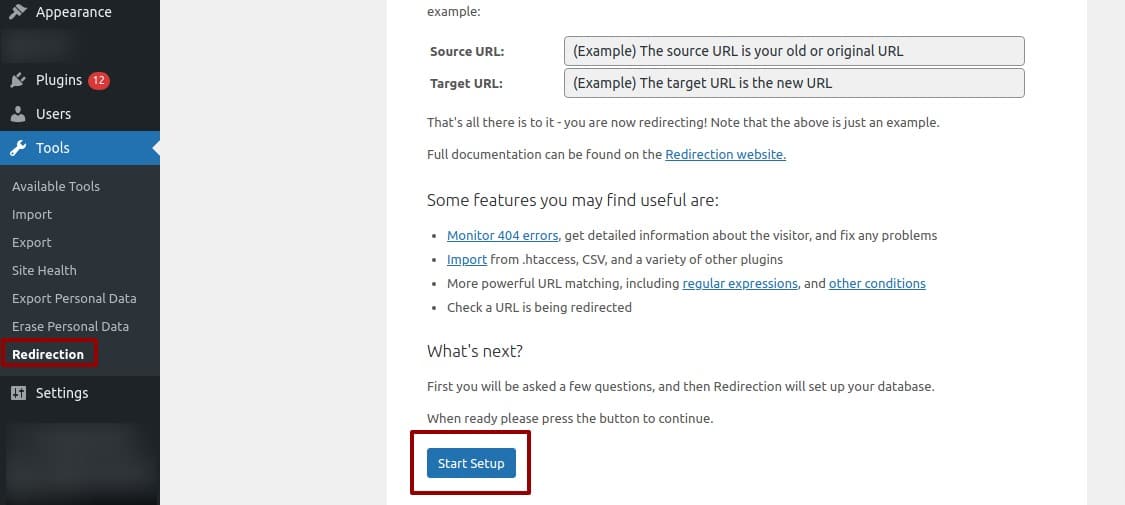
Login to your WordPress dashboard and install the plugin. After installing the plugin activate it and then go to Tools > Redirection page. From this page, you can set up the plugin by clicking the Start setup button.

After setting up the plugin it will redirect you to the plugin option. Now click on the site button and it will go to the site option.

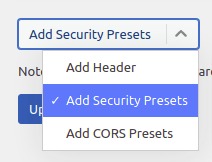
Now scroll down and look for the header option. You will find the added header drop-down menu at the bottom. From the drop-down menu select the Add security presets option.

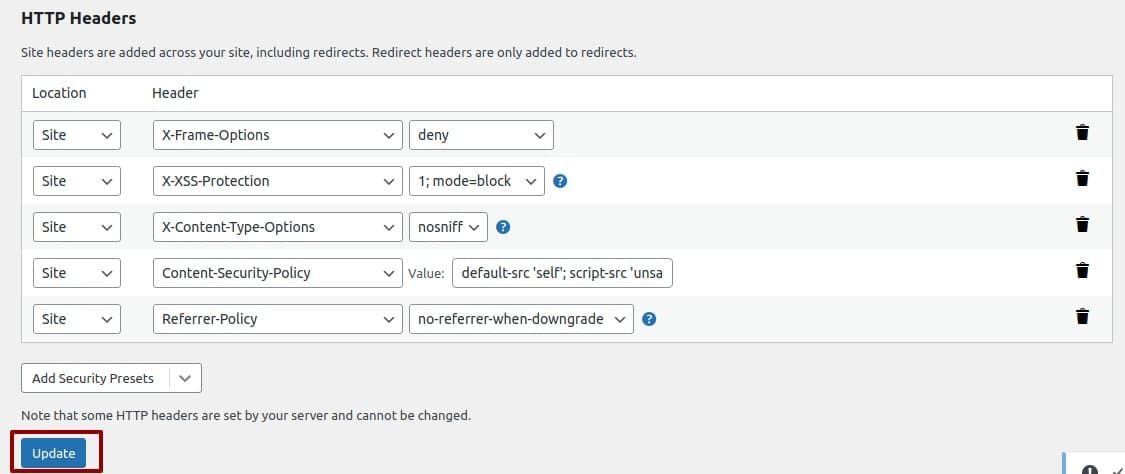
Again click on the option and it will open up the HTTP security presets list. Set your presets option and then click on the update button.

Check whether your security header is working or not
You can easily check whether your newly added HTTP security header is working or not. There are a lot of tools available. You can use the Security Headers website to test your HTTP security header. Just go to the website and then enter your website URL and click on the scan button.

It will scan your website and give you a report about your security header. It will show your website’s raw header, missing headers, and some additional information.
We hope this article will help you. If you like this article please like our Facebook page. If you have any problem you can check our Website Maintenance services.

