Looking for a way to add custom meta boxes to your WordPress website? Using custom meta boxes you can add additional metadata to your content. Custom metadata in your WordPress posts, pages will enable you to add additional features and interfaces that help you to speed up your workflow. You can create a user-friendly interface by adding custom metadata to your website.
Here in this article, we will guide you to the easiest way to add custom meta boxes to your WordPress website.
Add custom meta boxes in WordPress
Using a plugin is the easiest and quickest way to add custom boxes in WordPress. Here in this tutorial, we are using the Advanced Custom Fields WordPress plugin for this purpose. This plugin is one of the common and popular plugins to add custom meta boxes.
Install and activate the plugin and it will create a Custom Fields option in your admin dashboard. Go to Custom Field > Add New page to create your custom metadata. First, you need to add the title for your metadata and click on the Add Field button.

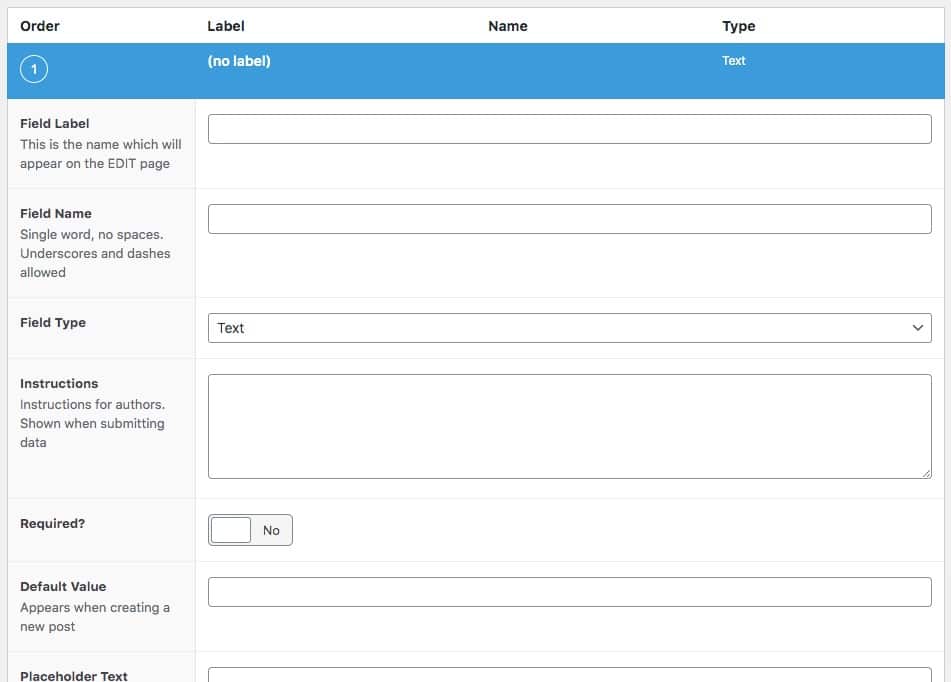
After adding the field it will show you different rows of settings for your custom metadata.

Field label: This is the name that will appear on the EDIT page. This is the title of your custom metadata. This title will appear in your backend.
Field name: You can add an additional name for your field. The name should be in one word, no spaces, underscores, and dashes are allowed.
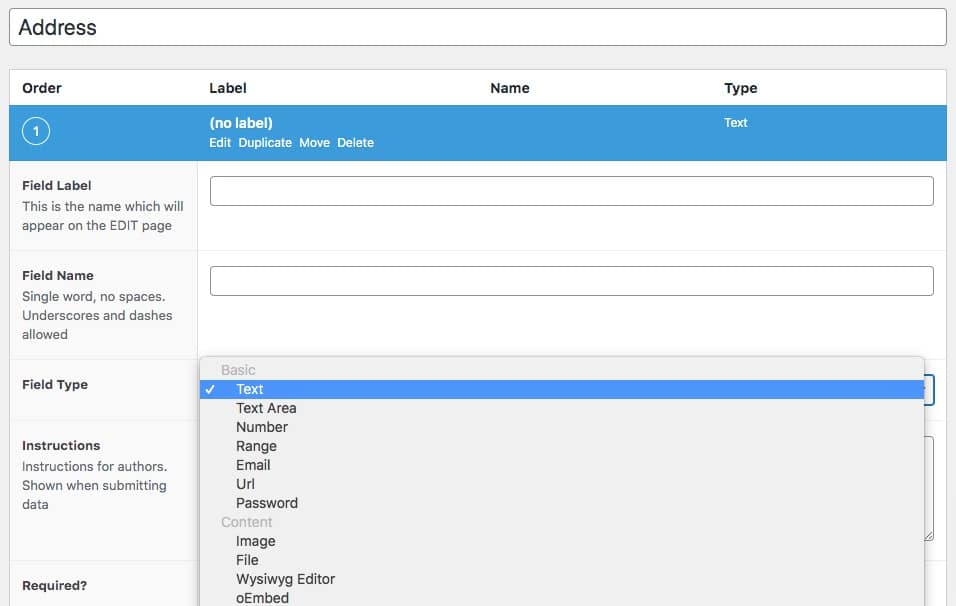
Field type: Next you need to add a field type. In the field type dropdown menu, you will find too many options like-
- Text
- Number
- Range
- URL
- Password
- Image & others

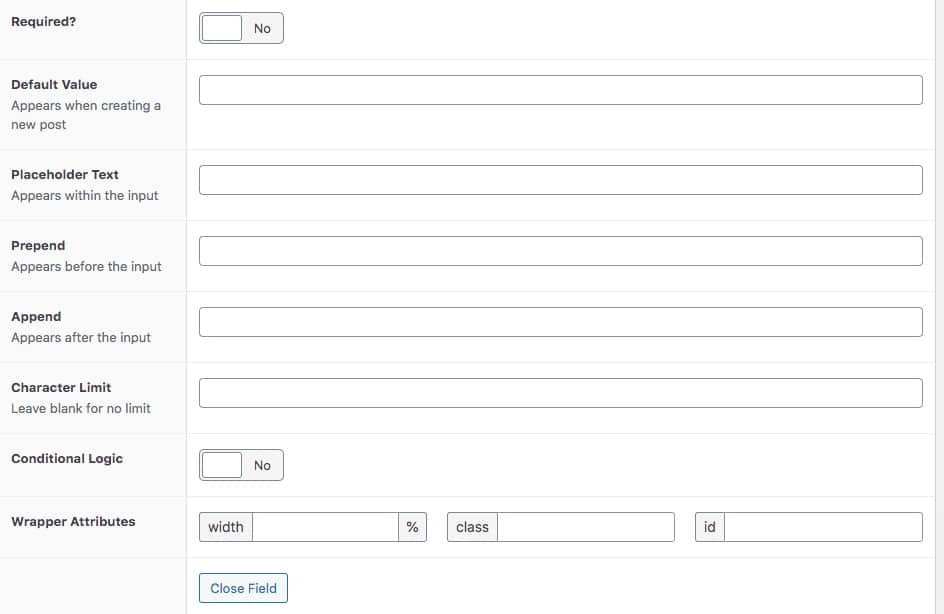
Instructions: In the instruction field you can add instructions for your authors. You can describe what the field is and when to use the field here. You can enable or disable the required option for the custom field.
There are also many options available like default value, placeholder text, character limit, and others. Click on the Close Filed button to close the settings option. If you want to add more fields then again click on the Add Field button and follow the same process.

Now move on to the location area where you can set rules to determine which edit screens will use these advanced custom fields.

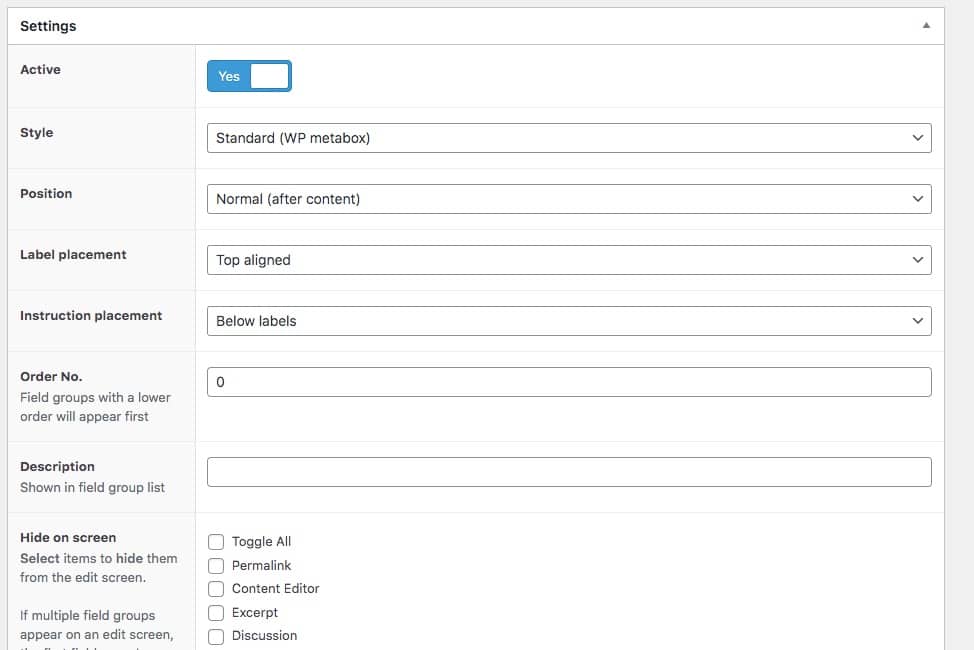
Now go to the settings section to style up your created metadata. Here you can enable or disable the active option. Then you can set the style, position, label placement, instruction placement, and others. From the hiding on-screen option, select items to hide them from the edit screen. If multiple field groups appear on an edit screen, the first field group’s options will be used (the one with the lowest order number)

When everything is done click on the Publish button. Now go back to your website and open up a post in edit mode to see how your metadata performs.

Display metadata on the website
There are different ways to display the metadata you added to your website. To add metadata to a specific post or page you can use a shortcode. For this go to Custom Fields > Field Groups where you will see the list of your created metadata. Click the metadata you want to enter. Copy the name of the metadata.
Now use this shortcode in any of your posts or pages to add the metadata to your website.
[acf field="address"]
You just need to change the name based on your created metadata. Now it will show the metadata value on the specific posts or pages.

Another way to display the metadata is to insert a code in your theme file. For this go to Appearance > Theme Editor and add the following code single.php, blog.php, page.php, files where you want to display the metadata.
<h3 class="address"><?php the_field('address'); ?></h3>
This will display the metadata value as h3 tag on your selected page.
Wrapping Up
Following the process, you will be able to add custom meta boxes to the WordPress website. You can see our other articles to learn Best Collaboration Tools For Developers & Designers
How to optimize Robots.txt for SEO in your WordPress website
Best WordPress WooCommerce Themes To Start Your E-Commerce Business With In 2022
We hope this article will help you. If you like this article please like our Facebook page.

