Do you want to change the WooCommerce language on your online store? If you are selling products globally then translating your online shop is a great idea to reach more customers. The default language of WooCommerce is English but around the globe, people want to see everything in their own languages. Also when you translate your website customers think that you care for them which creates a very positive impression about your website. So translating your online shop is very necessary. Here in this article, we will guide you to the easiest way to change the WooCommerce language.
Why do you need to change the WooCommerce language?
English is the international language and the default language of WooCommerce is English then why do you need to change the language? Even English is the international language many people don’t speak English. A major amount people around the world hardly understand English. When you want to reach customers around the world you need to think about their nature. If they do not understand the language definitely they won’t stay on your website. Changes in the language will prove a better user experience to the native customers.
If your targeted audiences are English then you don’t need to change the language. But if you target global audiences then you need to make your online store multilingual. Changing the language definitely boost your sale in that region.
Change WooCommerce Language
There are different ways you can change your WooCommece shop language. Here in this tutorial, we will try to cover all the possible ways.
Change the language from dashbaord
You can change the backend language of your online store. If you are not good at English then you can set your native language as a backend language. So the frontend language of your website will be English but the backend language where you will manage everything will be another language like Spanish or others.
To change the backend language of your website go to Settings > General page. Now scroll down to find the Site Language option. From the dropdown menu, you can change the backend language of your website. You can also install a new language from here.
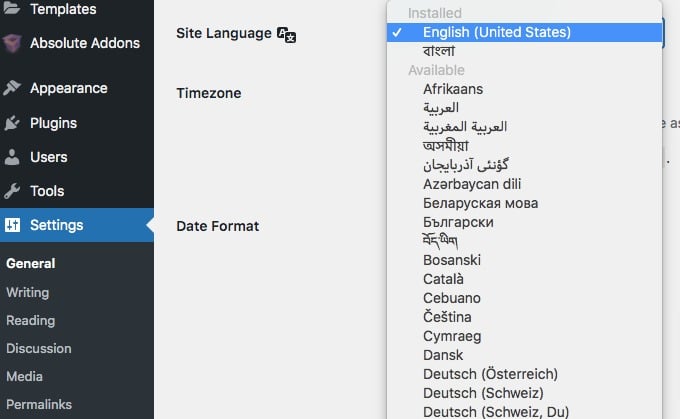
Just select the language you want to change and WordPress will change both dashboard and frontend with your selected language.
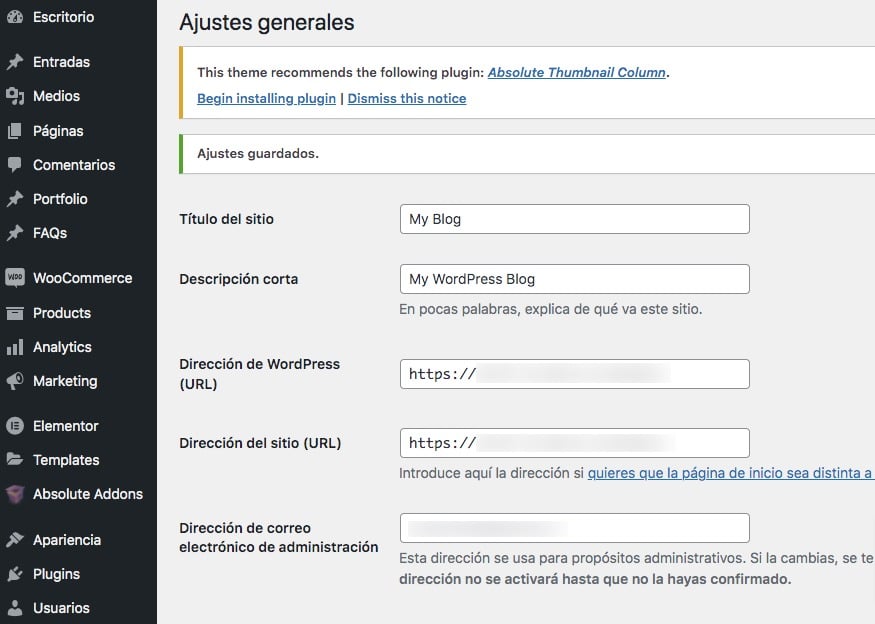
If you want to change only the backend language then go to the User > Profile page. Now scroll down to look for the language option. Here in the dropdown menu, you will see the installed language. Selecting a language will only change the backend language for you.

Install a language manually
WordPress is one of the most popular content management systems and provided translation for most languages. But if it misses your desired language then you can install the language manually on your website. For this, you need to download the language first from the WordPress community.
Go to the WordPress translations page and search for your desired language. You will see all the available languages here. You can also check the language percentages. When you find your desired language click on the percentage link.
Suppose you want to change the language in Arabic, so click on the percentage link in the Arabic language.
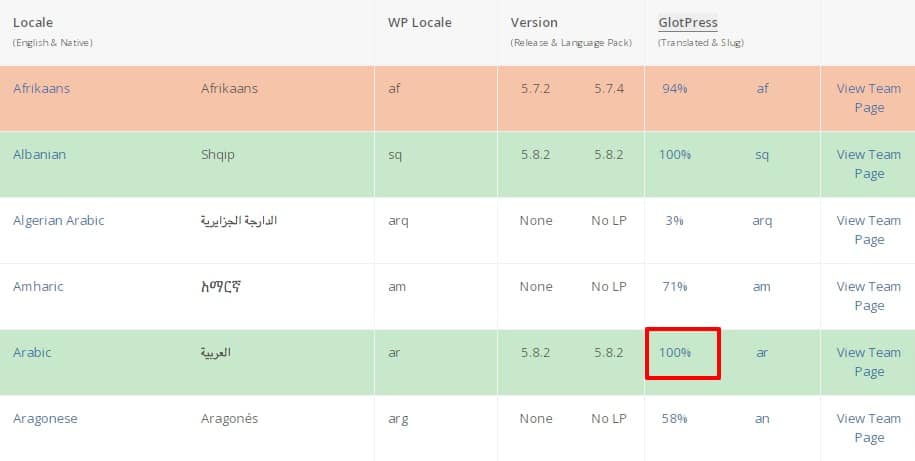
It will show you the development project and details of that language. Click on the project to download the file.

After clicking on the project link scroll down to find the export option. From the export option, select the .mo format and download the file.
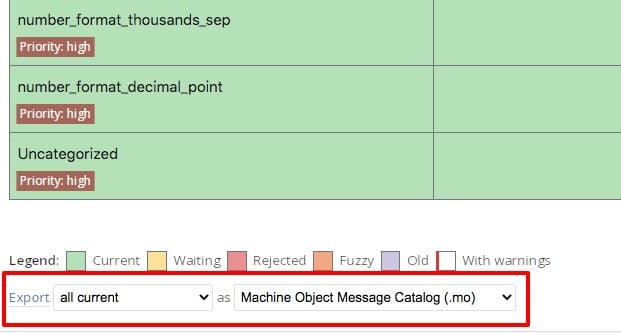
The file will be downloaded to your computer. Now you need to upload the file on your website using an FTP client or Cpanel.
Upload language file
Login to your website through Cpanel and then go to the file manager option. After that go to the wp-content folder. Here in this folder, you will be able to see a folder named Language. If the language folder is not available then you need to create a language folder.
Open the language folder and upload the language file you just downloaded. After uploading the file go back to your WordPress website admin panel and then Settings > General > Site language, here in the dropdown menu you will see your installed language. Now you can select the language.
Make your website multilingual
Using a multilanguage plugin is the easiest and quickest way to make your online store multilingual for everyone. Here we are using the Loco Translate WordPress plugin to make our online store multilingual. Before stared make sure that the WooCommerce plugin is set up properly.
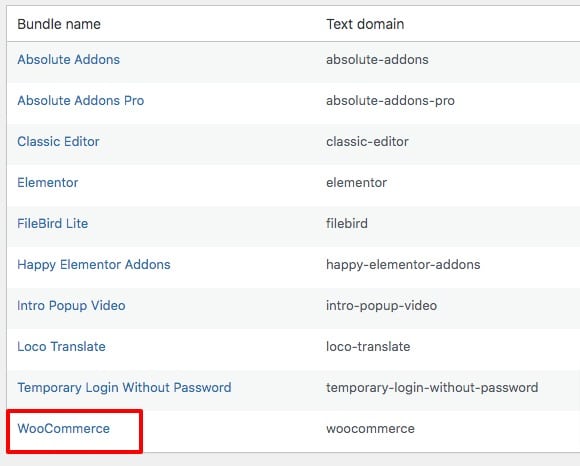
Install and activate the plugin and go to Loco Translate > Plugins page. Here you will see all the installed plugins on your website. Here in this list, you need to select the WooCommerce plugin.
Here you will see the available language for the WooCommerce plugin. You can also add a new language using the New language option.
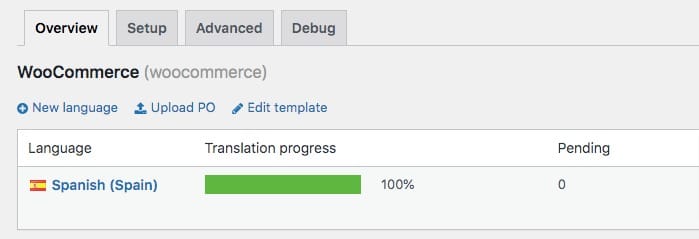
The system will translate the language. Based on your website size it takes some time to complete. When the translation is finished save the settings. Following the same way, you can add more languages to your WooCommerce shop.
Wrapping Up
Following the process, you will be able to change the WooCommerce language of your website. You can see our other articles to learn How to properly clear WordPress cache
How to add WordPress infinite scroll
How to enable WordPress debug mode
If you like this article please like our Facebook page. If you have any problem you can check our Website Maintenance services.

