Looking for a way to optimize Robots.txt for SEO on your WordPress website? Here in this article, we will guide you to optimize Robot.txt to improve your WordPress website SEO.
Robots.txt file is very important that helps the search engine crawl your website. It helps you to improve your website SEO. If you can optimize the Robots.txt file properly, you can easily get a higher position on search engines. But before optimizing it, you need to understand what Robots.txt file is and how it works?
What is the Robots.txt file?
A Robots.txt file is a file that tells the search engine to index or crawl a website’s pages. By default, the file is located in your website’s root directory or main folder. A Robots.txt file should look like this –
User-agent: [user-agent name]
Disallow: [URL string not to be crawled]
User-agent: [user-agent name]
Allow: [URL string to be crawled]
Sitemap: [URL of your XML Sitemap]
You can add multiple URLs in your Robot.txt file to allow or disallow any specific URL to index on a search engine You can also add multiple sitemaps if you want.
Why do you need a Robots.txt for SEO?
Without a Robots.txt file search engines will still index and crawl your website, but you don’t have any control over disallowing any specific page to index. If you just started your website and have less content then this won’t affect anything. You can run your website without having a Robots.txt file.
But day by day your website grows and you will have a lot of content, then you need to have more control over search engine indexing. Search engines have an indexing quota for each website. All of your website pages don’t need to crawl on search engines like admin pages, files pages, and others. So if you do not control it, then your important pages won’t get a chance to index on search engines.
Disallowing unnecessary pages from crawling helps you index more important pages of your website.
How to create a Robots.txt file
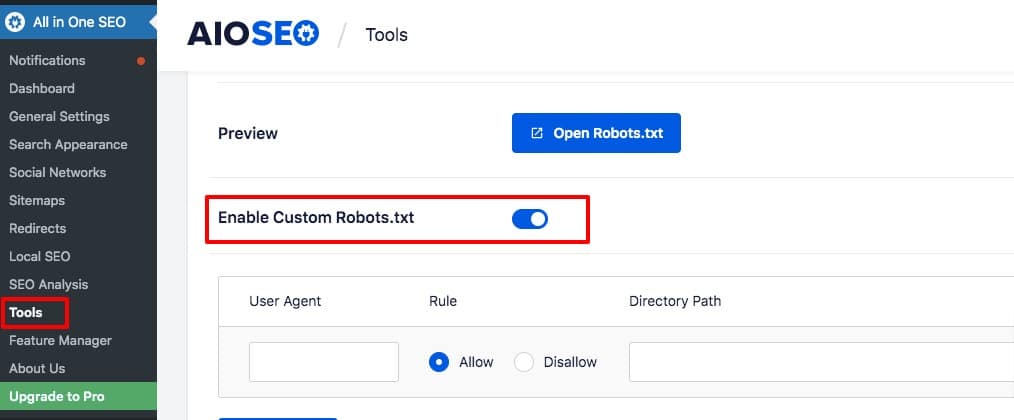
There are different ways to create a Robots.txt file. Using a plugin is the easiest and quickest way to create a Robots.txt file. All in One SEO WordPress plugin will offer you an easy way to create a Robots.txt file. Install and activate the plugin and then go to All in One SEO > Tools where you will find a default Robots.txt file. First, you need to enable the Enable Custom Robots.txt option.

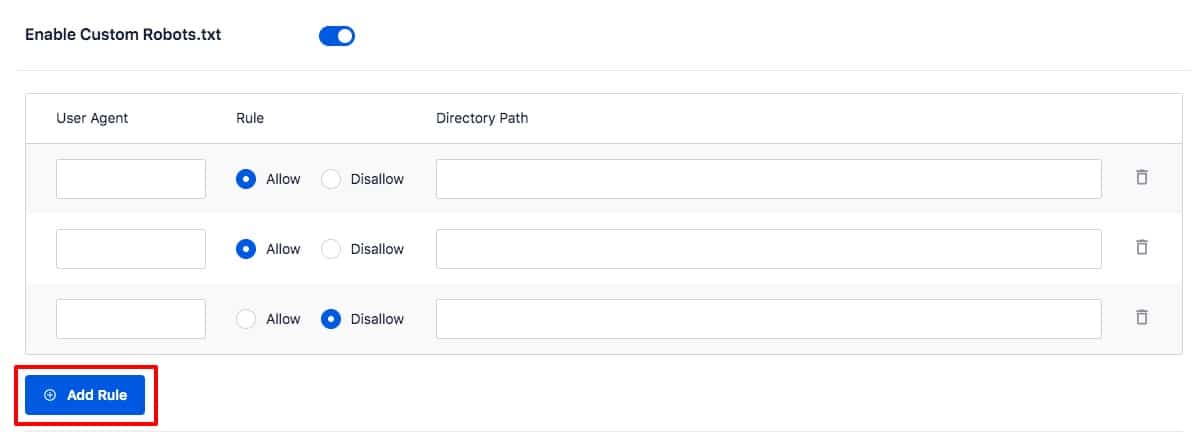
You can see the default Robots.txt file using the preview button. The default Robots.txt file will tell the search engine not to crawl your core WordPress file or directory. Now you can add your custom rules. To add a new role, add the user agent, allow or disallow it, and lastly enter the URL. Click on the Add rule button.

The rule will be added automatically to the Robots.txt file. Follow the same process again to add another rule.
Test Robots.txt for SEO
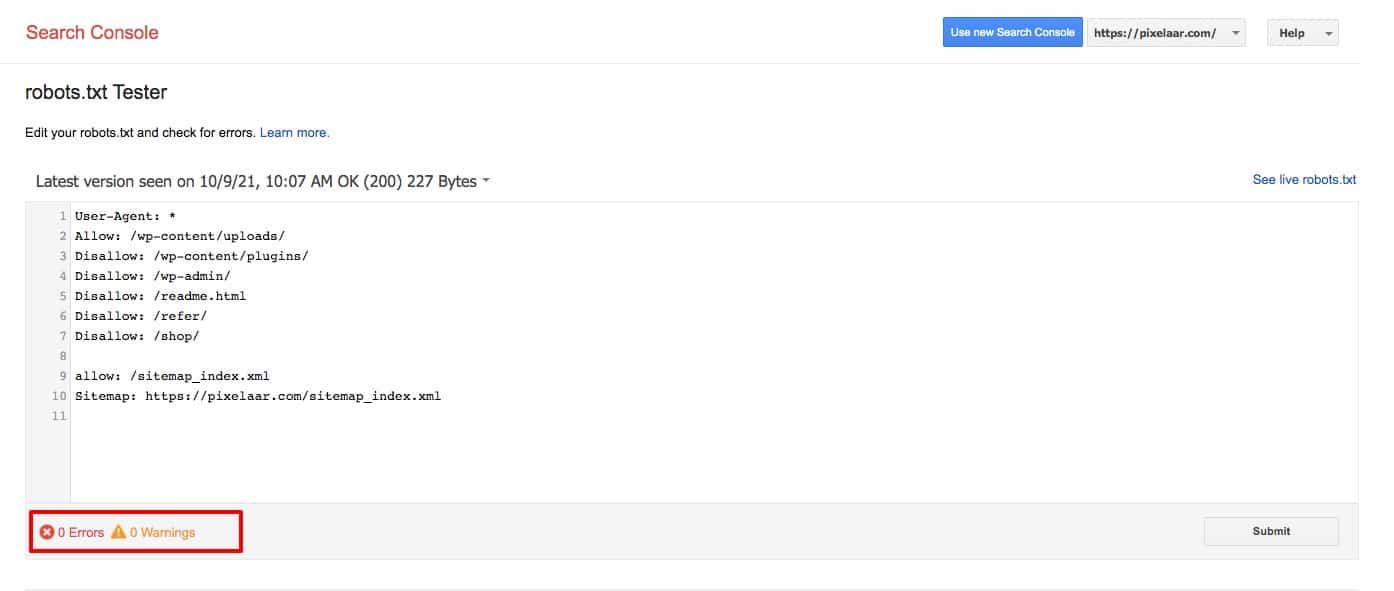
You can test your Robots.txt file using Google Search Console tools. If your website is not connected to Google Search Console, then you can check this article to connect your website to Google Search Console.
Go to your connected website’s Google Search Console Robot Testing Tool page and select the property. It will show you the warning and error of your Robots.txt file.

Wrapping Up
Following the process, you will be able to optimize your Robots.txt file to improve SEO on your WordPress website. You can see our other articles to learn Reasons why WordPress is the best option for eCommerce
WordPress or Squarespace – What You Should Know Before You Choose
How to improve conversion on an eCommerce website
We hope this article will help you. If you like this article, please like our Facebook page.

