Are you searching for the way to add a blogroll in WordPress website?
Blogroll is the area of your website where you can display your others website links that you own. You can also add website links that you admire or recommend your users to visit those website. If you own multiple website then then blogroll area is the best place to showcase those website.
Here in this article we are going to discus about the importance of blogroll and also show you the easiest way to add a blogroll in WordPress website.
Why you need to add a Blogroll?
Blogroll is the section where you can display others blogs link you own or recommend. When you have multiple website and one of your website get popular and getting a lots of traffic then you can add a Blogroll to show your others website on that popular website. It will help you to generate traffic for your other websites.
You can add others related blog link to your Blogroll are too so your user can check their websites and compere them with yourself. It is a great way to get audience trust.
Now let’s take a look how we can add a Blogroll in WordPress website
How to Add a Blogroll in WordPress Website
WordPress navigation menu has a lots of features and provide us to add different links in our header, navigation bar, sidebar and footer section. To add a Blogroll you are using the navigation menu features. You can easily create and manage a Blogroll section for our website using the navigation menu.
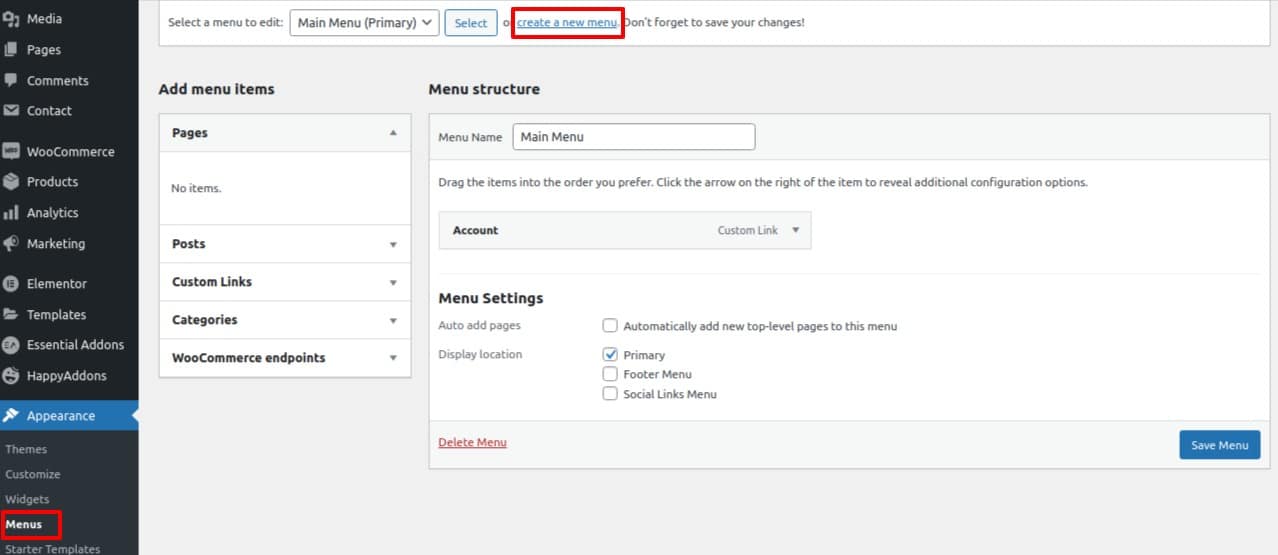
At first login to your WordPress website and then go to Appearance > Menus. It will take you to the menu page where you can find the create a new menu option. Just click on the create a new menu link.
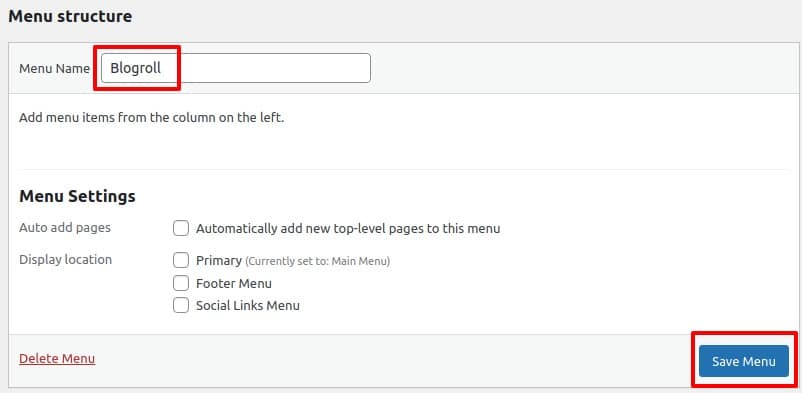
Create menu page will open up and now you need to add a name of your menu from the menu name field. As we are creating menu for Blogroll so you add the name as Blogroll. It will help us to understand the purpose of the menu. Add a name and click on the create menu button.
Our menu fro Blogroll is created now we need to add items for the menu. To add click on the Custom links tab from the left dashboard. Now in the link field add the kink of your website and in the title field add the title.
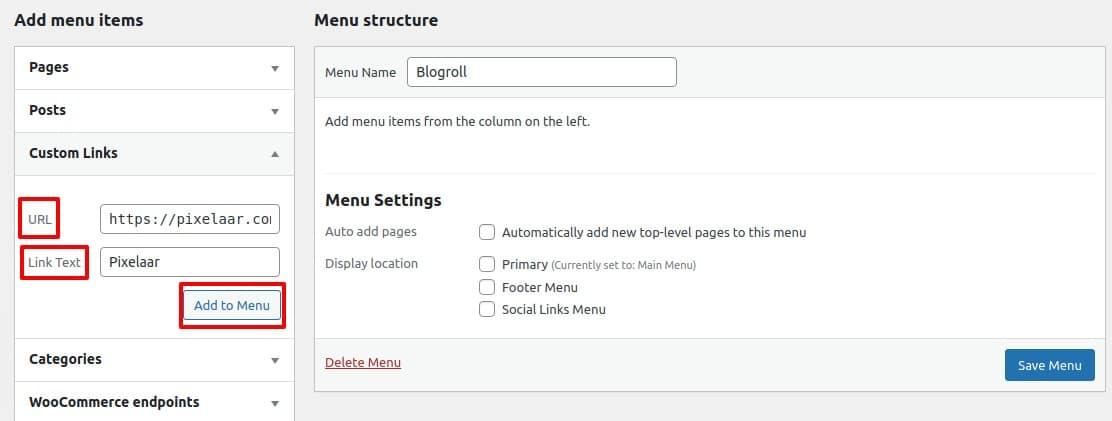
After that click on the Add to menu button. You menu item will be added to the menu and you can see it at the right column.,
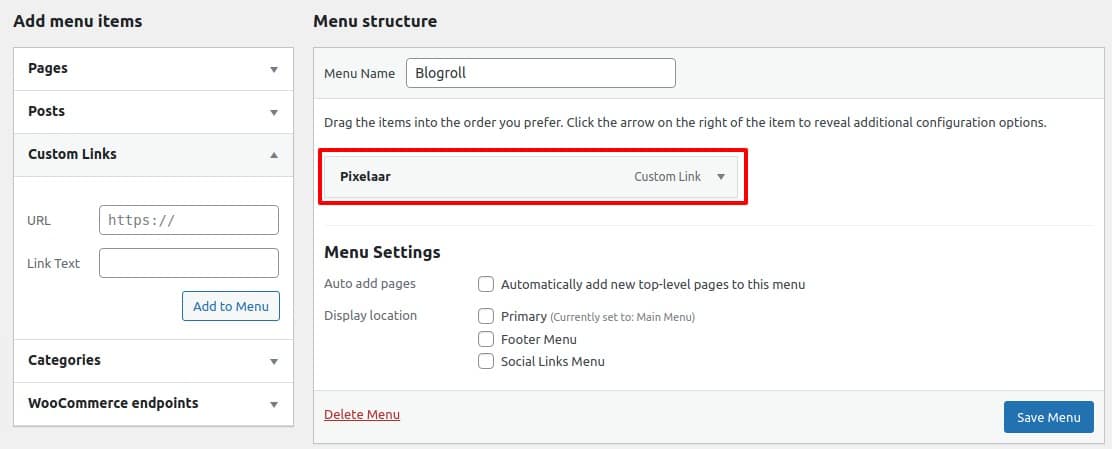
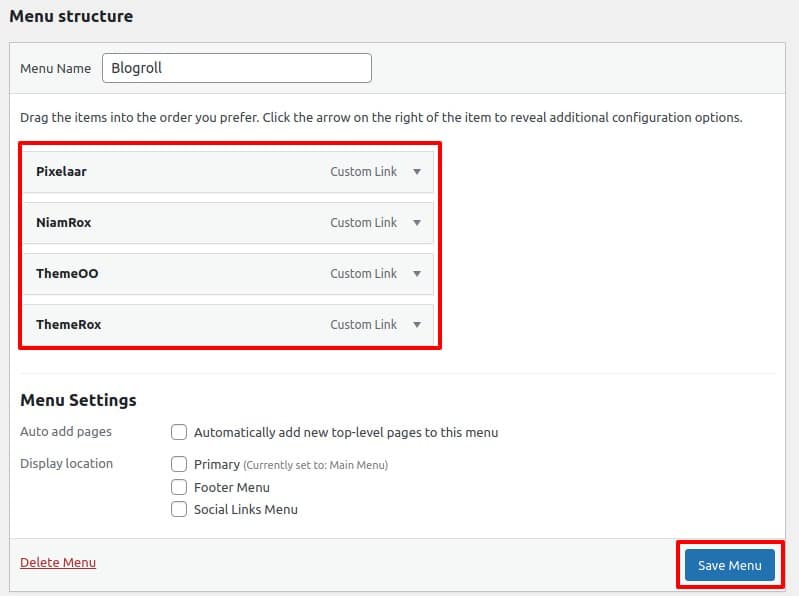
Following the same way you can add multiple link and title for the Blogroll area. After adding all the websites you own or recommend click on the save menu icon to save the changes.
Make Nofollow links for Blogroll
In your Blogroll are you are using external link which leads your users to redirect to other website. If all the websites are own by you then it’s not a big problem but if you are recommending others website in your Blogroll area then you need to open that link in a new window and make them nofollow.
To make all the links nofollow click on the Screen option button on the top right corner.

Scree option will expand up and from there check the link target and link relationship(XFN) box.

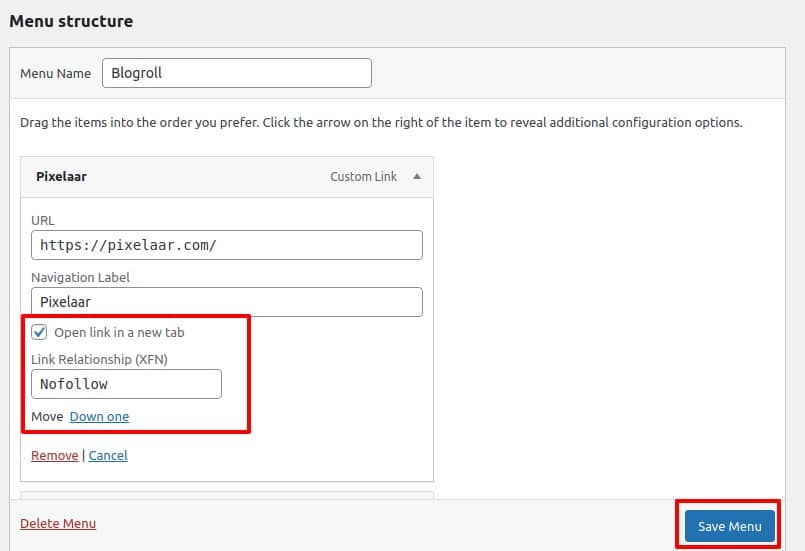
Now move on the menu link we just added and then expand it and check the open link in a new tab box and add nofollow in the ink relationship(XFN) box.
Repeat it for all the available link you added in your Blogroll area and then click on the save menu button.
Show Blogroll section in website
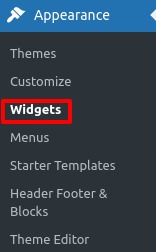
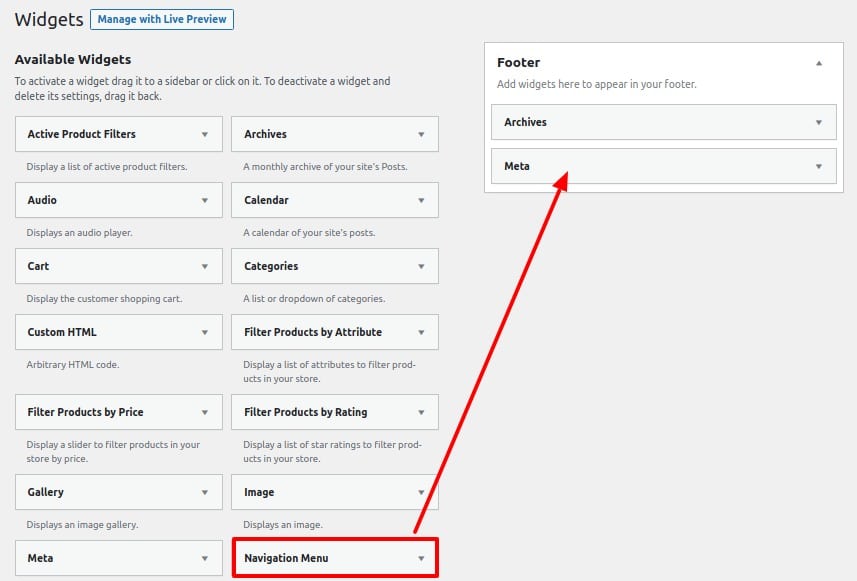
You can display the Blogroll section in any place of your website. But the best place to display this section is in the sidebar or footer. To add the section in footer area go to Appearance > Widgets.
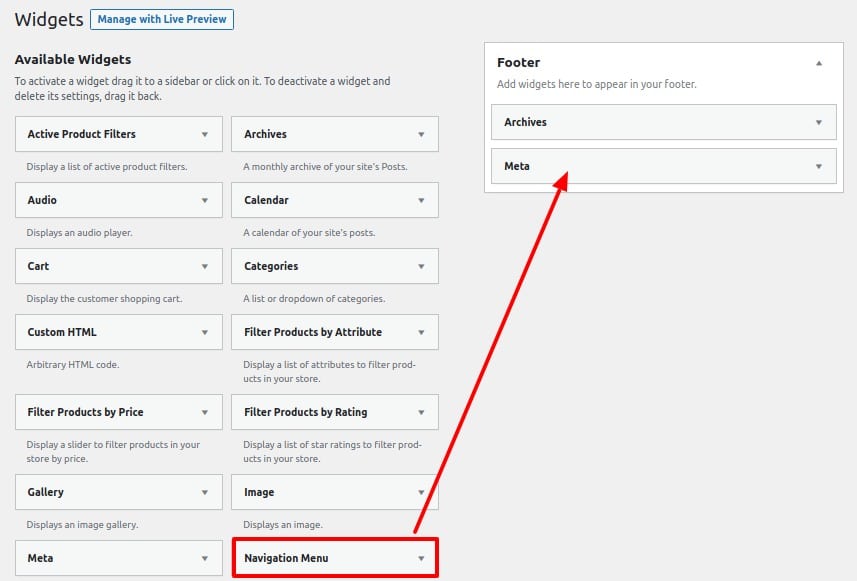
Now drag the navigation menu widgets and drop it to the footer section.
After that expand the navigation menu in footer section and add a title and from the select menu dropdown add select the Blogroll. When everything is done click on the save button.
Now go to your website and you can see your Blogroll will display in the footer area.

We hope this article will help you. If you like this article please like our Facebook page. If you have any problem you can check our Website Maintenance services.

